Grid decoration
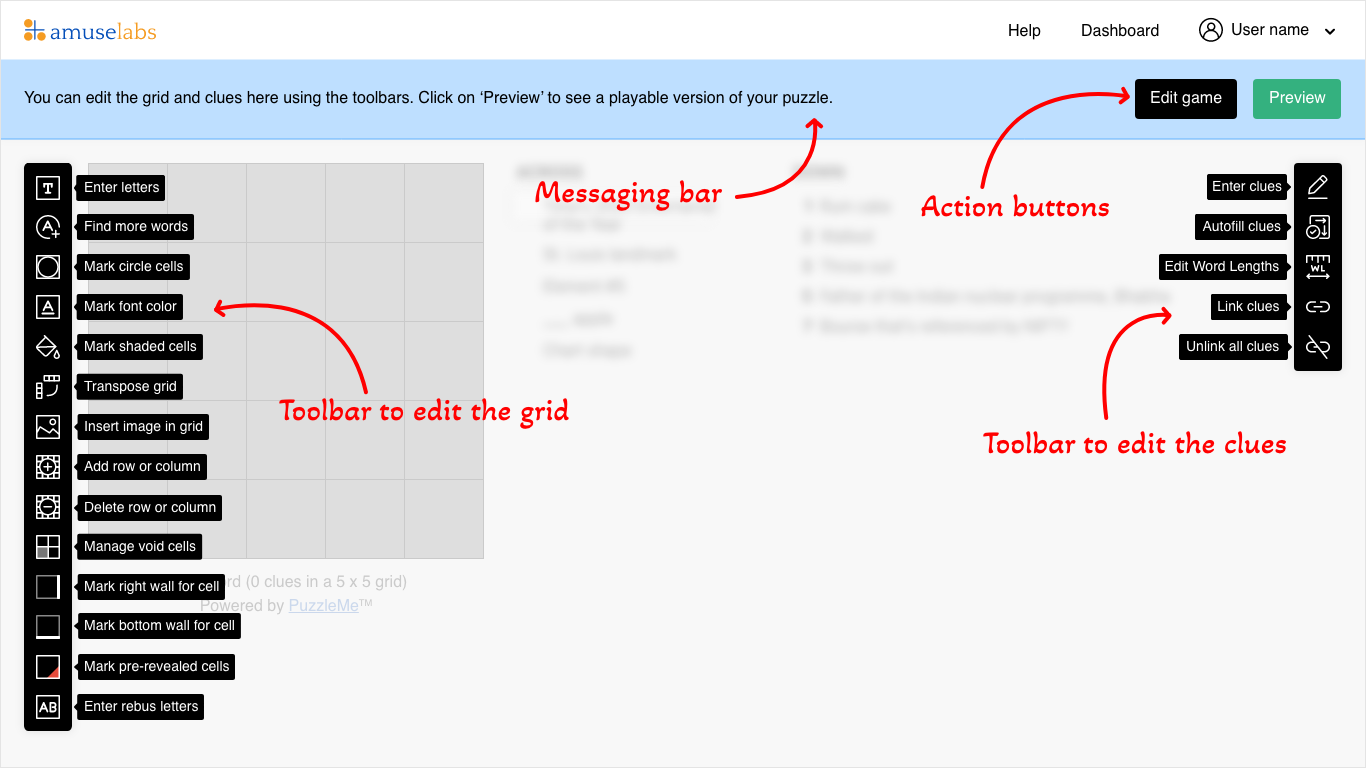
Learn how to use the grid editor to customize the look and feel of your crossword puzzle.
PuzzleMe offers powerful ways to customize your crossword's appearance to enhance visual appeal, integrate themes, and subtly hint at solutions. These controls are used creatively by constructors to improve design, enhance gameplay, provide hints, etc.

Pre-revealed cells
Pre-revealed cells are grid squares that already have their answers displayed at the start of the game. The user cannot type over the letters in these cells.
To mark cells as pre-revealed:
- Click the Mark pre-revealed cells icon (orange triangle at bottom right of the cell) in the toolbar on the left side of the grid editor.
- Click on any cell in the grid that already contains a letter to mark it as pre-revealed. A red marking appears in the bottom right corner of pre-revealed cells. To remove the marking, click the cell again.
- Click Save in the navigation bar to save your changes.
Void cells
Void cells are black squares that are transparent, making the puzzle appear to have a non-linear shape.
You can choose to make only certain black squares void, or you can make all black squares void with one click.
By default, all black squares are black. Tweak void cells in your grid using the following steps:
To mark cells as void:
- Click the grid decoration icon in the toolbar on the left side of the grid editor.
- Select mark void cells from the grid decoration menu.
- Click on any black square in the grid to mark it as void (transparent). To revert a void cell back to a black square, click it again.
- Click Save in the navigation bar to save your changes.
To mark all black cells as void:
- Click the grid decoration icon in the toolbar on the left side of the grid editor.
- Select mark all black cells void from the grid decoration menu.
To mark all void cells as black:
- Click the grid decoration icon in the toolbar on the left side of the grid editor.
- Select mark all void cells black from the grid decoration menu.
Circled cells
Circled cells highlight specific letter entries with a circle in the crossword grid. This can emphasize a theme or provide indirect clues. Circled cells are visible from the start of the game.
To mark cells as circled:
- Click the mark circled cells icon in the toolbar on the left side of the grid editor.
- Click on the cells in the grid you want to circle. A circular border will appear around the selected cells. To remove a circle, click the cell again.
- Click Save in the navigation bar to save your changes.
Shaded cells
Shaded cells have a background color different from white. Use them to visually highlight a theme, wordplay, or simply for aesthetic purposes.
To mark cells as shaded:
- Click the mark shaded cells icon in the toolbar on the left side of the grid editor.
- In the color picker that appears below the navigation bar, choose a color.
- Click on the cells in the grid to apply the selected background color. To remove shading, click the cell again after selecting white in the color picker.
- Click Save in the navigation bar to save your changes.
Font colors
You can change the font color of letters in specific cells. This can emphasize theme or add visual interest. Font color is visible when players enter letters in these cells.
To change font color in cells:
- Click the mark font color icon in the toolbar on the left side of the grid editor.
- In the color picker that appears below the navigation bar, choose a color for the font.
- Click on the cells in the grid where you want to change the font color. To revert font color to default, click the cell again after selecting the default color (usually black or a contrasting color).
- Click Save in the navigation bar to save your changes.
Image in grid
You can insert images into the crossword grid, spanning across multiple cells if desired. This can visually represent the theme, provide subtle clues, or enhance visual appeal.
To insert an image in the grid:
- Click the insert image in grid icon in the toolbar on the left side of the grid editor.
- Click the top-left cell where you want the image to start.
- In the popup window, drag and drop your image file or click to upload it.
- Set the desired width and height in grid cells for the image. For a full background image, Start X and Start Y should be 1 and Width and Height should be the same as the grid size.
- Click the insert button in the popup window. The image will appear in the grid.
- Click Save in the navigation bar to save your changes.
To delete an image from the grid:
- Click the insert image in grid icon in the toolbar on the left side of the grid editor.
- Click on the top-left cell of the image you want to delete.
- Click on the image itself in the grid. A confirmation dialog will appear.
- In the confirmation dialog, click delete image.
If you need to adjust the image placement, delete the existing image and re-insert it with the desired settings.
Examples
This Spyscape crossword illustrates the use of both pre-revealed cells and void cells to control puzzle layout and add an interesting dimension to the game. The 5 Boroughs puzzle from Lollapuzzoola illustrates how a visually beautiful puzzle can be created with PuzzleMe. The Crucinova puzzle uses images in grid to achieve a beautiful effect.